

Halloween is only a few weeks away (talk about SCARY!), but this also signals the start of the holiday season, and that’s actually pretty exciting as I love this time of year. Last year, I had a blast doing our Pastel Goth Halloween extravaganza with the every fabulous Tula, from Whorange. Click here to check out our shenanigans.
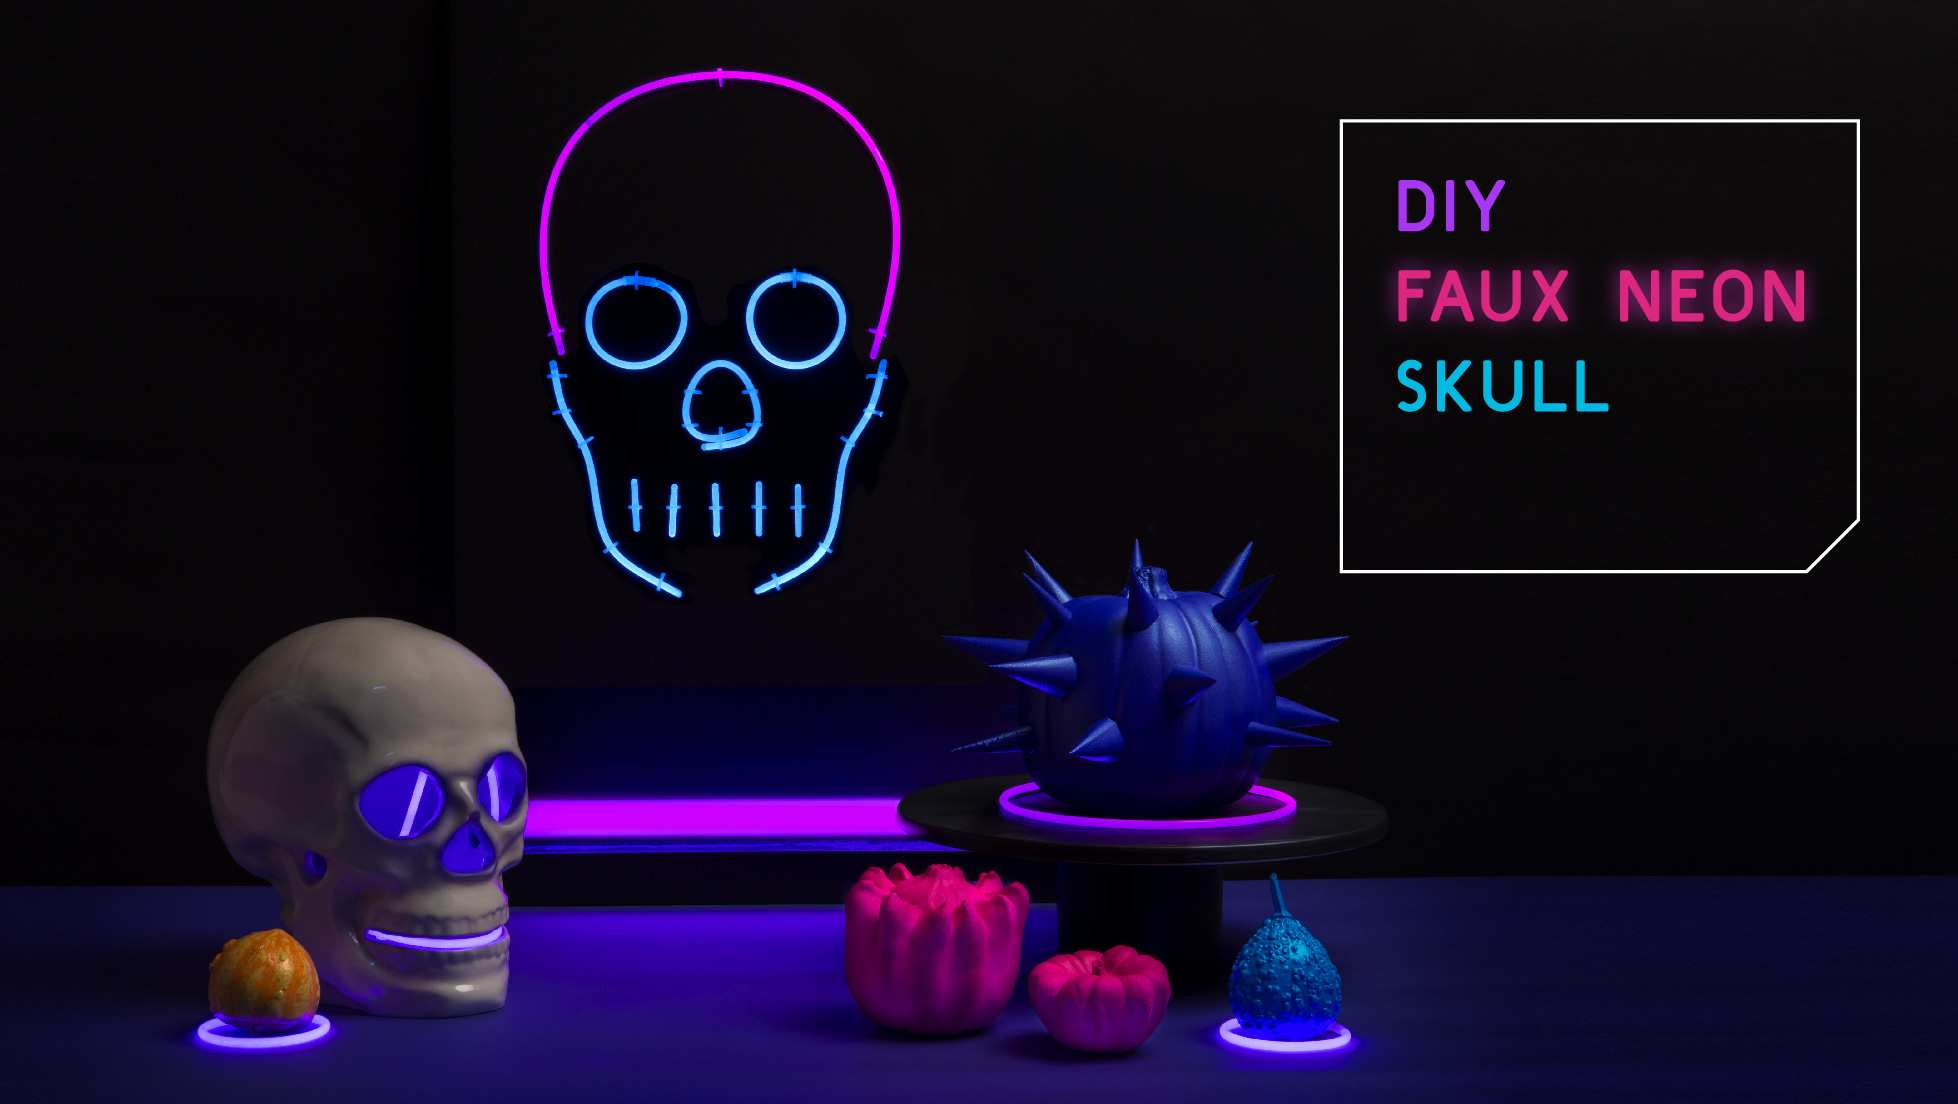
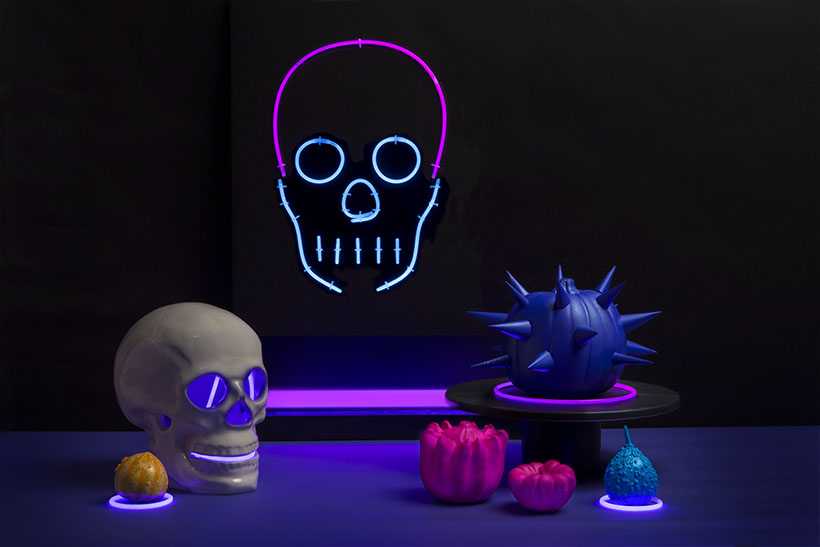
This year, I decided to take a detour from pastels, and PUMP IT UP! We’re talking NEON, baby!… But I’m not talking about Day-Glo, I’m talking actual luminescent neon!
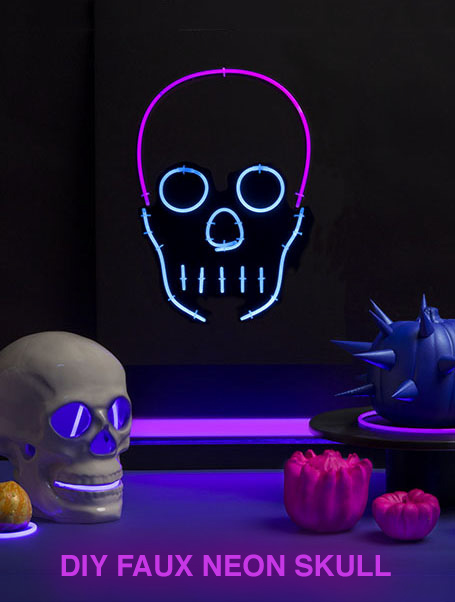
Urban Outfitters has this neon skull, but I decided to try my own version using glow sticks- you know, the ones you can get at amusement parks, or that you’d be sporting when you’re out ravin’. I found a bunch at Party City.
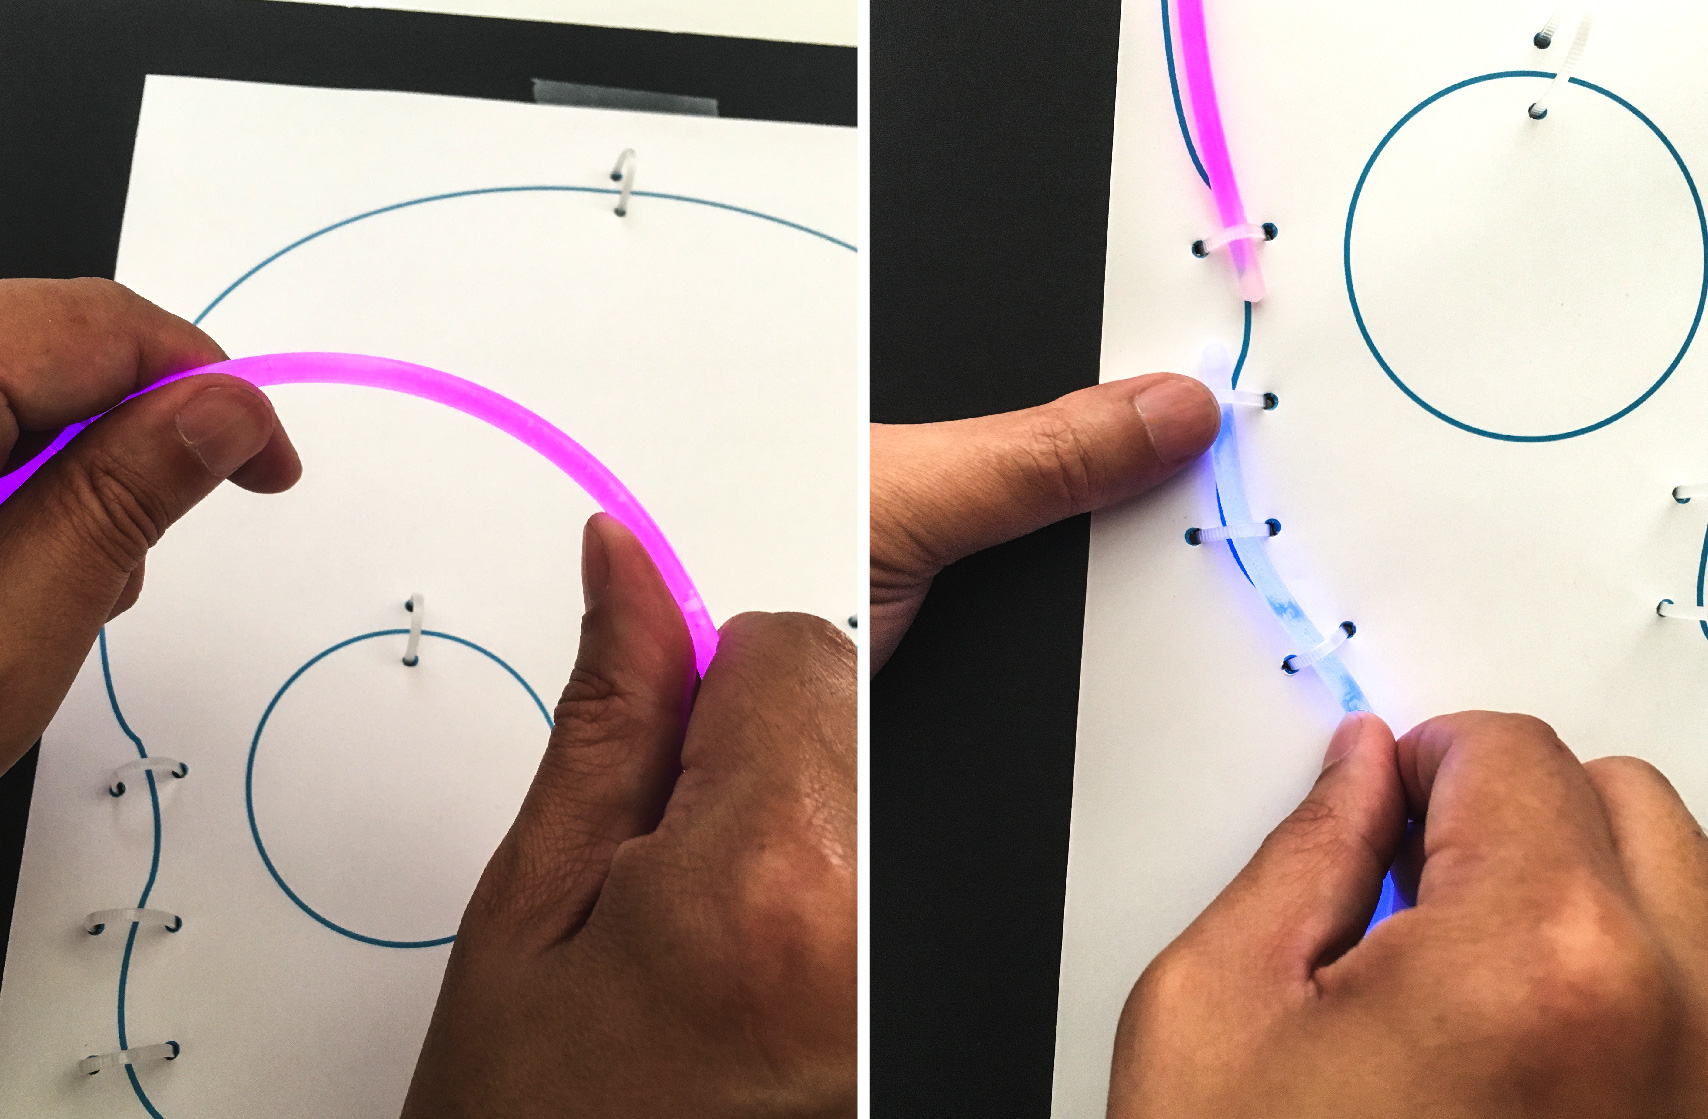
This faux neon skull wall hangning is pretty easy to do, but I do suggest you get someone to help you actually put it together. I found it’s easier if one person holds on to the glow stick, while the other clamps them down.
Here’s what you’ll need:
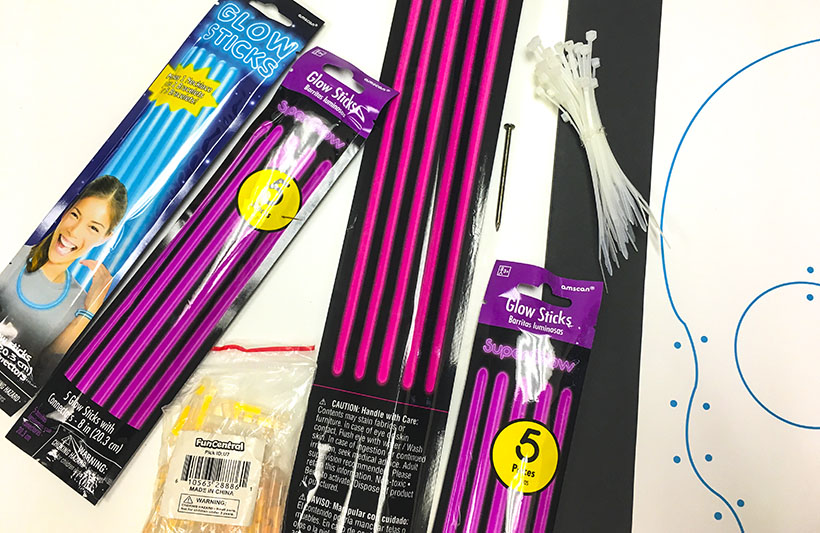
• 1 package of long glow sticks (long enough for a necklace) for the top half of the skull
• 1 package of smaller (bracelet size) glow sticks (usually come in 5 pack) for the sides, eyes, and nose
You could get other colors if you wanted to make the skull parts different colors. I opted for just blue and pink)
• 1 package of mini glow sticks (1.5 inch) for the “teeth”
• at least 25 mini clear cable ties (I found it good to have extra on hand in case you need to replace any after you clamped them… in other words, in case you mess up on any, like I might have… er… um….)
• 1 piece of Black foam board – I bought a single piece of all black 30 x 40 foam board and cut it in half.
• 1 nail, or sharp object to pierce the foam board to make holes for the cable ties.
…And that’s about it for materials. The rest is fairly simple, but again, it helps to have another person on hand to help you string the glow sticks through the cable ties.
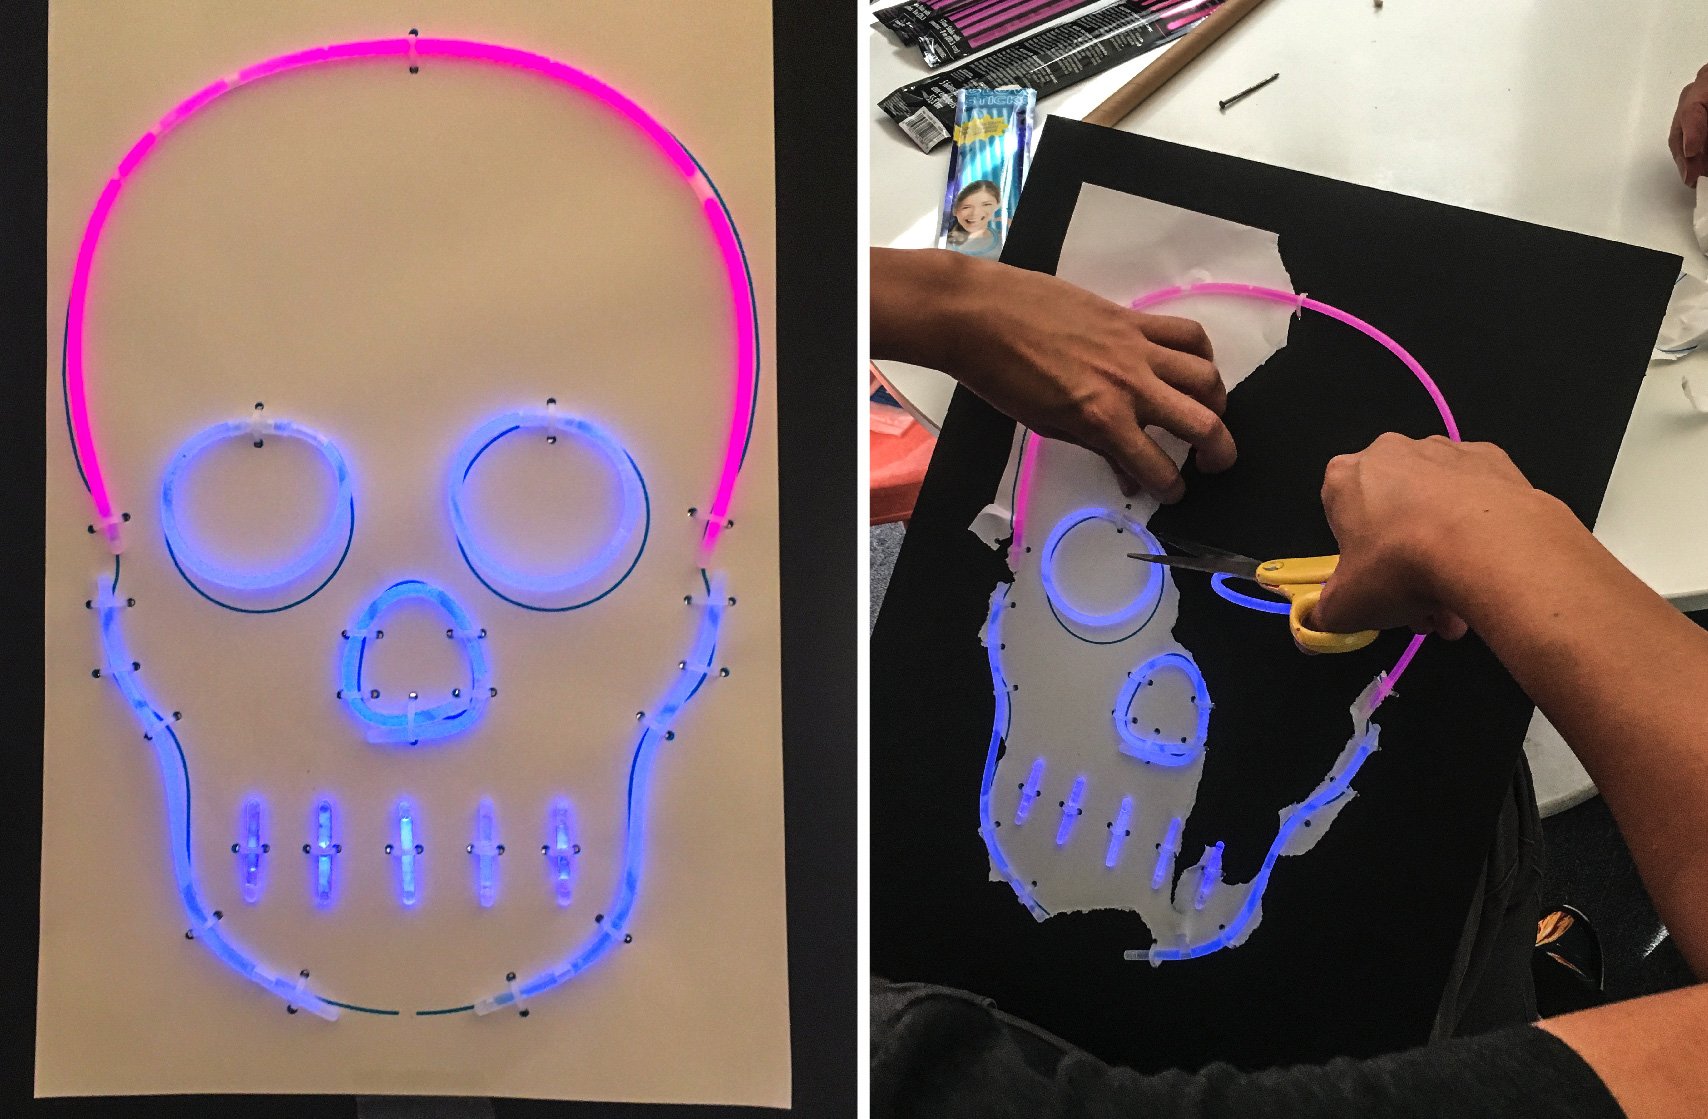
First step is to either create a template of the shape you want, or, in this case, you can simple download and print out my handy template I created here. It’s 11×17 so you’ll either need to enlarge it and/or tile it- or if your printer can print that large, then just print it out!
Next, lightly tape the template to the board. Ok, from here, you have a few ways you can go:
Option 1: You could trace over the template with a pen or pencil, tracing hard enough to leave an impression onto the foam board, but not hard enough for you to cut or rip through the paper. This is so you have a light impression and reference of the shape you need to mold the glow sticks to.
Option 2: Or, you can simply leave the template paper on, and continue creating the skull, and just tear the paper afterwards. However, if you do that, it’s probably a good idea to not secure the cable ties too tight until after removing the template. Otherwise, it will be difficult to tear the paper off afterwards. I did the later and encountered a few trouble spots where the paper got stuck or wedged underneath the glow sticks after ripping the template paper off.
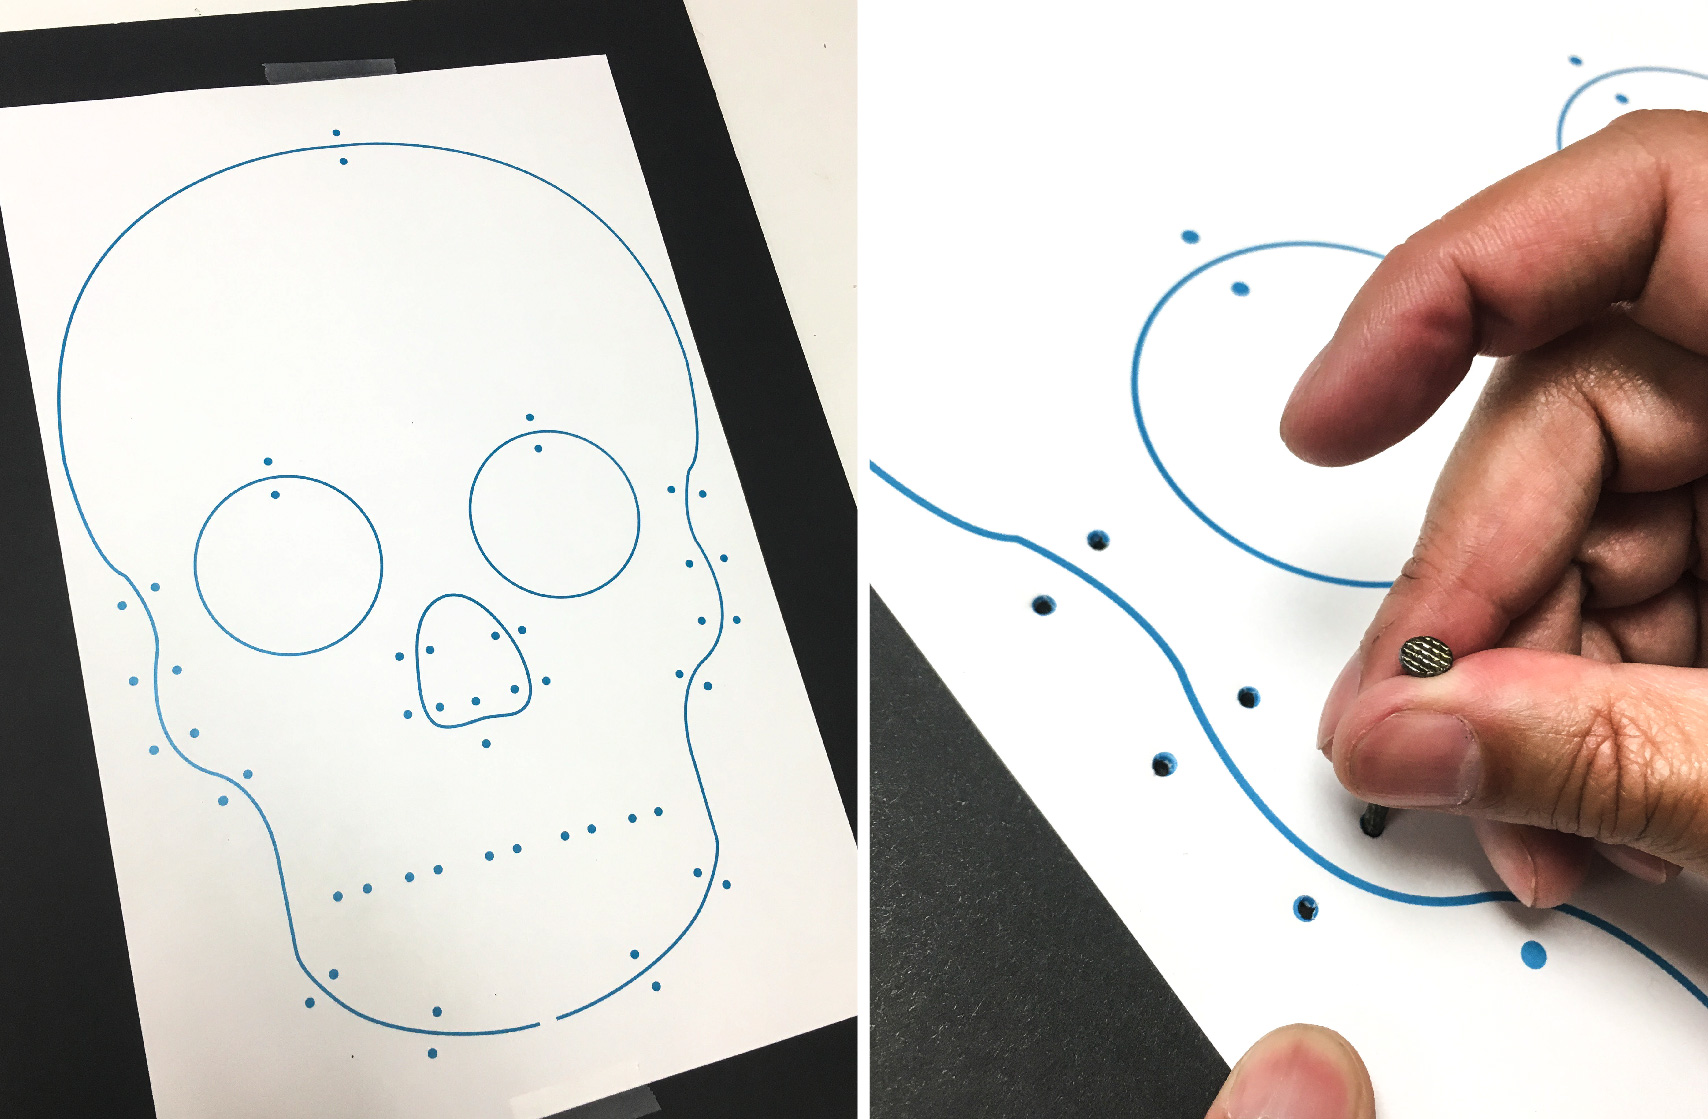
Anyway- whichever way you go, the rest is the same. Simply punch the holes with your nail, or sharp object. loosely thread the cable ties through, securing them only after you’ve put the glow sticks through and in place.
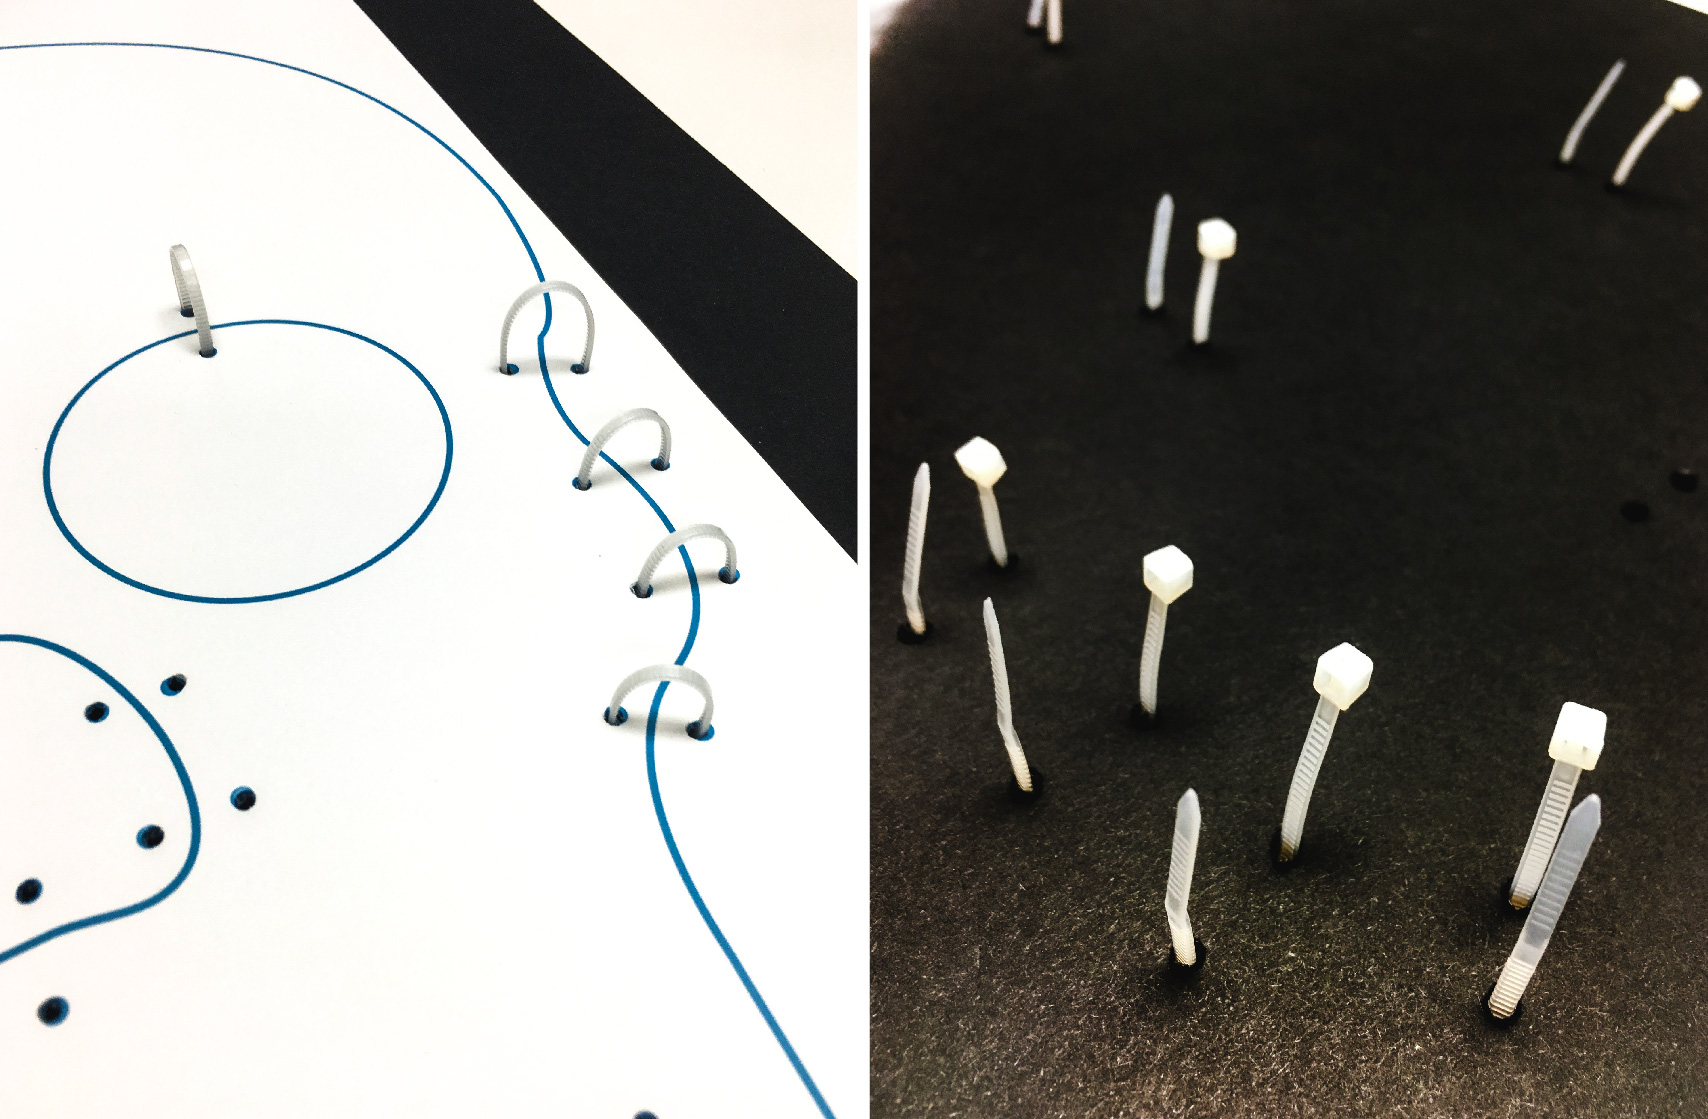
Snap the glow sticks, and get them glowing, and then start bending and securing them into the shape!
For the eyes, use the connectors provided in the package to form a bracelet and position it so the connectors are at the top, then secure the eyes with the cable ties there.
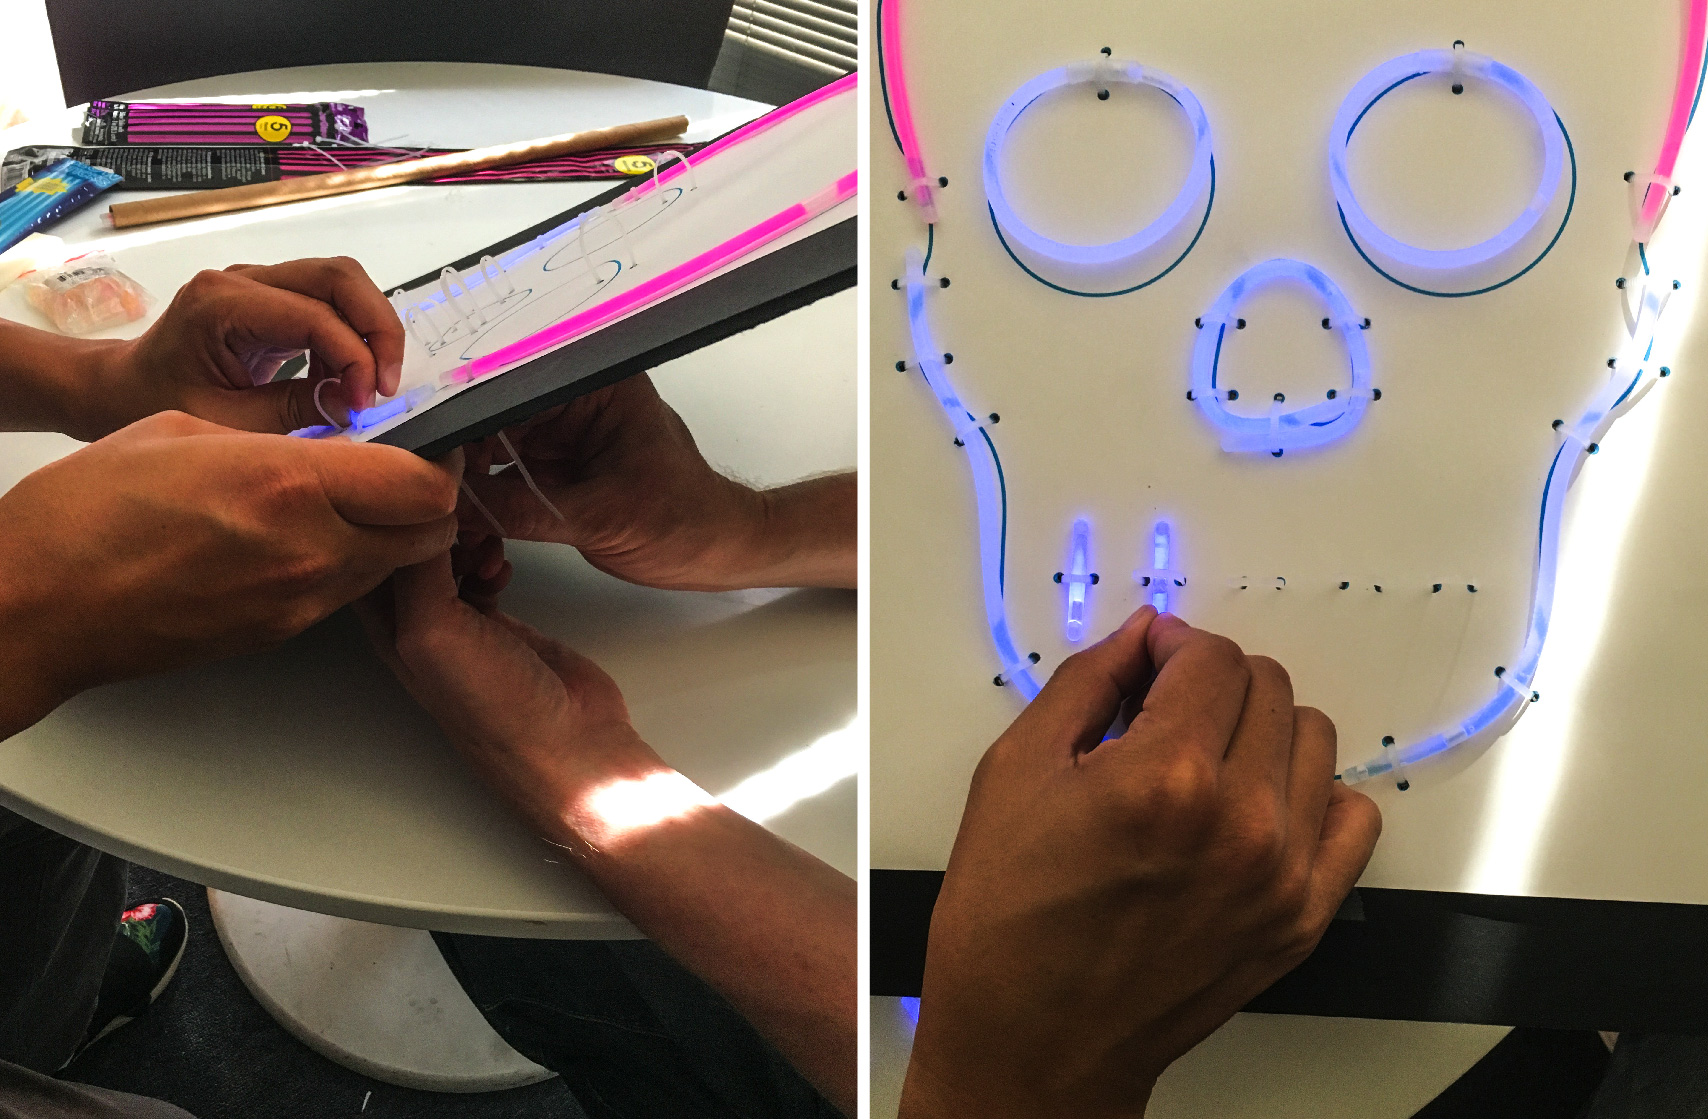
For the nose, I started by centering the glow stick, then bending one side in, then the other, and securing as I went. For the bottom half sides of the skull, I started at the top, and carefully bent and molded the stick to follow the template shape, clamping down as I went.
Again, I found it easier to have a friend help you secure the ties, as you hold and mold the glue sticks into the shape, clamping down as you go.
You’ll obviously want to do this project right before you need to display it, as the glow sticks will only glow for a few hours, but it really doesn’t take long to create.
And there you go! Faux neon creepy coolness!
*This post contains affiliate links, which means I may receive a commission on sales of linked products.